Showing posts with label vegan ice cream. Show all posts

Monday, December 05, 2011

Vegan Egg-Nog, Vegan Lattes, AND Vegan Egg-Nog Ice Cream!

It's that time of year again... vegan egg-nog is here!  Man, I loved egg-nog as a kid, but I never felt very good after drinking it.  Now, I still love it, and don't feel yucky after drinking it!  Yah!  Thanks to some delicious vegan egg-nogs on the market...

The brand I like best (in Canada) is So Nice Noel Nog.  Normally, I'm not a big soy milk drinker.  Actually, I don't drink a lot of milk myself, but do make 'lattes' with it (more on that soon) - plus I use a lot of non-dairy milk for baking and also cooking.  Usually I prefer almond milk, but when the Noel Nog hits the shelf, I'm in.  

I should mention that in Canada Vitasoy also has a 'Holly Nog'.  For my tastes it's a little sweet, and also has a thinner, less creamy consistency than the So Nice version.  My preference is So Nice, but Vitasoy's Holly Nog can stand-in for the the ice cream (we'll get there too!).  But, Vitasoy also makes a Peppermint Chocolate milk that is delicious heated for a hot chocolate.

Even more exciting, I hear that So Delicious has recently come out with their coconut milk versions of both the nog and peppermint chocolate milk.  I can't wait to try them.  Unfortunately, I doubt we'll see them in Canada this year.

Back to the So Nice Noel Nog.  Mostly I enjoy it in vegan lattes.  No  Not this kind of latte.  This one's good, but expensive.  
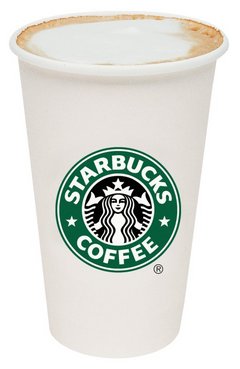
So, make your own!  I make a tea latte (hmm, lat-tea?!) just about every mid-morning.  I love it.  Comforting, satisfying, and delicious.  

Through most of the cold months I make lattes with almond milk,  and use Trader Joe's Organic Ruby Red Chai Rooibos tea bags.  


But this time of year I also mix it up with the Stash Decaf Pumpkin Spice Tea.  


Here's how you make your latte:
kitty mugs!
  1. Get a big mug.  Big.  I use these kitty mugs.  I've had them since forever and love them.
  2. Add your tea bag of choice (or loose teas if you prefer).
  3. Get your kettle going, just a little boiled water will do.
  4. Add boiled water to your tea, but just a couple of inches, enough to start steeping the tea (not too much so your latte isn't diluted).
  5. Meanwhile, put some almond/soy milk* in a small saucepan on your stove.  Use enough to fill your mug/cup, maybe 3/4 - 1 cup, or more... Remember, big mug = big yummy latte.
  6. Heat milk over medium/medium-low.  Takes a few minutes, keep your eye on it.  It will start to simmer, and then magically come to a frothy boil.  Don't let it boil over!  Once it's good and frothy, pour into your mug.  It won't stay frothy, but will bring more flavor out of your tea, and well, it's creates a mood!
  7. Sweeten to taste (if needed) with a pinch of stevia or liquid sweetener if you like.  If using a noel nog combo (see below), you probably won't need any sweetener.  If using just unsweetened almond milk, a pinch of stevia tastes great.
*Note:  When I make the noel nog lattes, I usually use half-and-half.  Half almond milk, half noel nog, that is!  The noel nog is very sweet, so I cut it with unsweetened almond milk.

Then I take the Noel Nog to the North Pole!  It's now a holiday traditions to make my Egg-Nog  Ice Cream.  
Egg-Nog Ice Cream (with Coconut Caramel Sauce)
I don't think you can buy a dairy-free egg-nog ice cream.  But, even if you can, it probably won't compare to this homemade version.  It's one of my recipes from the ice-cream chapter in LTEV.  But you can get it now!

Make it hot, make it cool, make it egg-nog special.  Just make it dairy- (and egg-) free please... 

"...milk has been linked to Type 1 diabetes, prostate cancer, osteoporosis, multiple sclerosis...casein, the main protein in dairy foods, has been shown to...promote cancer and increase blood cholesterol and atheroscleratic plaque"(p. 294, The China Study)

(p.s. This is my last post for a week or so.  We are moving house this week, and I'll be up to my noel-nog-filled eyeballs with work.  Wish me luck!)

Thursday, January 28, 2010

Egg-Nog Ice Cream

(update:  forgot to mention that I have a cool giveaway coming up - not one of my books either!)

Uh huh.  I realize we are past the holidays.  But, doesn't this look wicked good?!

And, if you have a love for anything egg-noggy as I do, you may have stocked up on those Vitasoy Holly Nogs when they were on special during Christmas.  Or, maybe you I snatched just one last "Noel Nog" last week because its expiry date wasn't until February.

Funny, I don't drink soy milks normally.  But give me 'noel nog' or that Vitasoy Peppermint Chocolate milk and I'm in there!  (and that Peppermint Chocolate milk is amazing warmed up for hot chocolate if you still have some of those in your pantry - tote it in your travel mug in the car!)

Back to the ice cream.   If you have some soy nog in your fridge or cupboard looking back at you, work it into my Egg Nog Ice Cream.  You'll need a blender to puree the milk with some other ingredients.  I use my Blendtec (man, I love that machine!), and then you pour the mix into your ice cream maker.  As I mention in my t/s article (that's all about ice cream luvin'), I use the ice cream attachment to the Kitchenaid stand mixer.  Very handy!

And, that's a new caramel sauce gorgeously clinging on to the egg-nog ice cream.  Maybe I'll get that recipe posted for you too.  It's SO good - and easy to make.  Get your spoons ready, folks!
"...milk has been linked to Type 1 diabetes, prostate cancer, osteoporosis, multiple sclerosis...casein, the main protein in dairy foods, has been shown to...promote cancer and increase blood cholesterol and atheroscleratic plaque" (p. 294, The China Study)

Thursday, April 24, 2008

Cookie Sandwich Ice Cream Cake! (hoo-ahh!)

who-weeee!

I feel like I've been spinning on a carnival ride for the last couple of weeks! It's been capital B-usy. Last week my mom arrived for a visit from Newfoundland, and it was also our eldest daughter's birthday. So, in addition to getting Nanny's room ready for a visit, mommy was also preparing for a birthday and at-home party. Prizes and loot bags and games and ice cream cake and cupcakes to bring to class and the list goes on!

'
Here's the ice cream cake I made for the bday party. I prepped it on Wednesday and kept in the deep freeze until the party. Since Thursday was devoted to making cupcakes for the class to share on Friday (and I made them much like these ones using my Triple Layer frosting and cake recipe), I decided not to bake again on Friday with needing to get the house ready for the party on Saturday. I eased my workload the teensiest bit by making an ice cream cake for the party.

Okay, you know me too well... there was an ulterior motive to making the ice cream cake. Heck, yeah, if mommy is prepping for a birthday party all week, she is certainly going to make her favorite kind of cake - hah! But when time came for the cake, the kiddos loved this, with two layers of different ice creams, chocolate sauce, and two flavors of sandwich cookies! Wanna' know how to make it? It's really simple. Truly, it is! Goes like this:


1) Get a springform pan (ie, the kind used for cheescakes). Line the bottom and sides with the sandwich cookies. You will have to cut a few in half to help them fit. I used the vanilla ones on the bottom and the chocolate along the sides.


2) Have two quarts of ice cream ready, your choice of brand and flavor. Soften one quart (in the fridge or on your countertop), and scoop it into the pan to cover the cookies on the bottom and just cover that layer around the sides. Spread to smooth out as much as possible. Drizzle with chocolate (or other sauce), then pop in the freezer to harden that 1st layer of ice cream again.

3) Once it's hardened, soften the 2nd quart of ice cream. Pull out your pan from the freezer and layer in the second flavor of ice cream. Again, smooth out somewhat, but it's fine if it's a bit uneven... mine was and I liked how it looked!

4) Garnish with extra crumbles of cookie sandwiches and sauce, or other toppings like sprinkles or nuts.

5) Cover well and place back in the freezer until ready to eat. Before eating, remove for 5-10 minutes, then remove the springform ring and place cake on a platter or plate to cut.

Aren't birthdays the BEST?! (nudge nudge, wink wink... hubby, you out there?... you can manage this one for my bday right? wait now, Mother's Day is coming up and oh yeah, I deserve it!)

wait a minute, we all deserve a lil' ice cream cake... go make your own and celebrate whatever you like! Now, go eat, drink & be vegan. :)